
I finally posted my 10th thing to Thingiverse! The road has been fun and the interactions I had with the community were better than I expected!
The idea of my final project was to ask friends and classmates for ideas for physical objects that they would like to have that could be 3D printed on the Makerbot. I designed them on an educational version of Solidworks, printed them out on my Makerbot Thing-O-Matic 3D printer and gave them to the people who requested them. I also uploaded the designs onto Thingiverse (an online site maintained by Makerbot Industries to facilitate sharing designs of physical objects with other users) which made them available to anyone else who wanted to use or improve them. I released all of my designs under an Attribution – Non-Commercial – Share Alike license. This project explored first hand the collaboration and network effects that we had been talking about in class. It allowed me to get some really neat ideas into people’s hands and onto the web community so others could benefit from the designs.
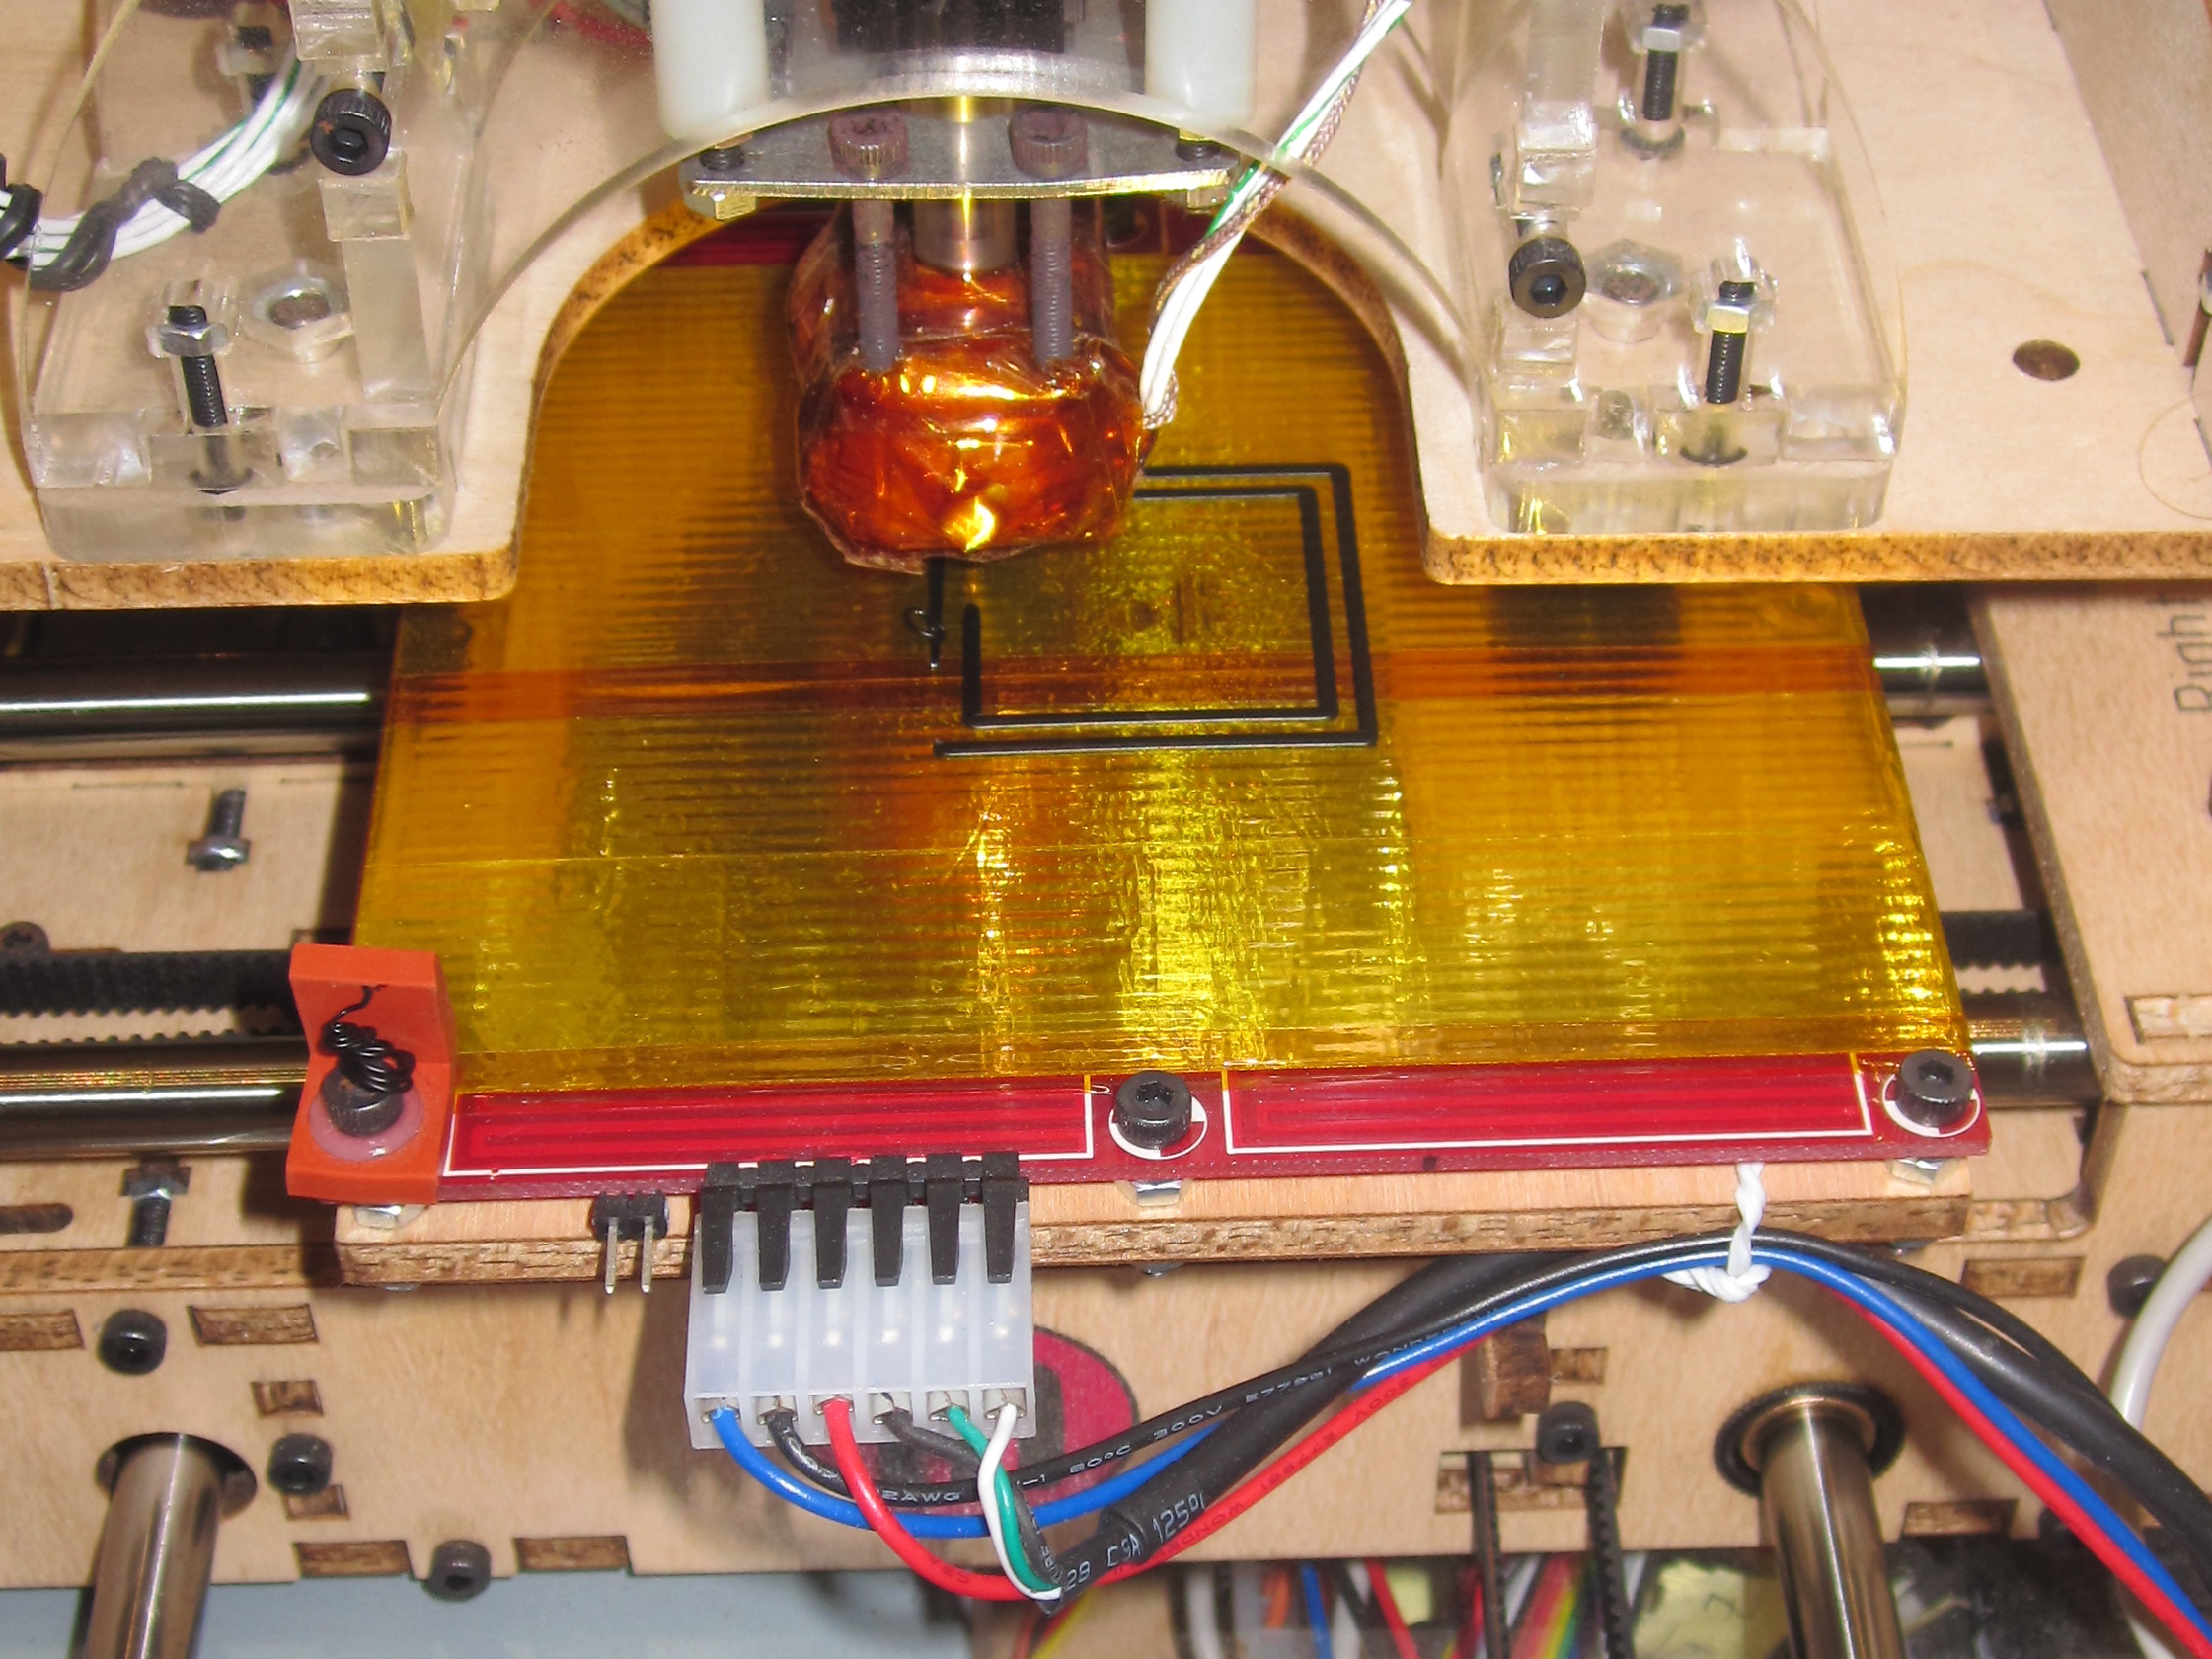
If you don’t know, the Thing-O-Matic is an open source, open hardware 3D printer developed by Makerbot Industries. The Thing-O-Matic is capable of making 3D parts out of ABS thermoplastic within a build envelope of approximately 4″ x 4″ x 4″. For those of you who didn’t get the chance to see my presentation in class, here is a time-lapse video of the device’s construction and the device printing out a toy bell.
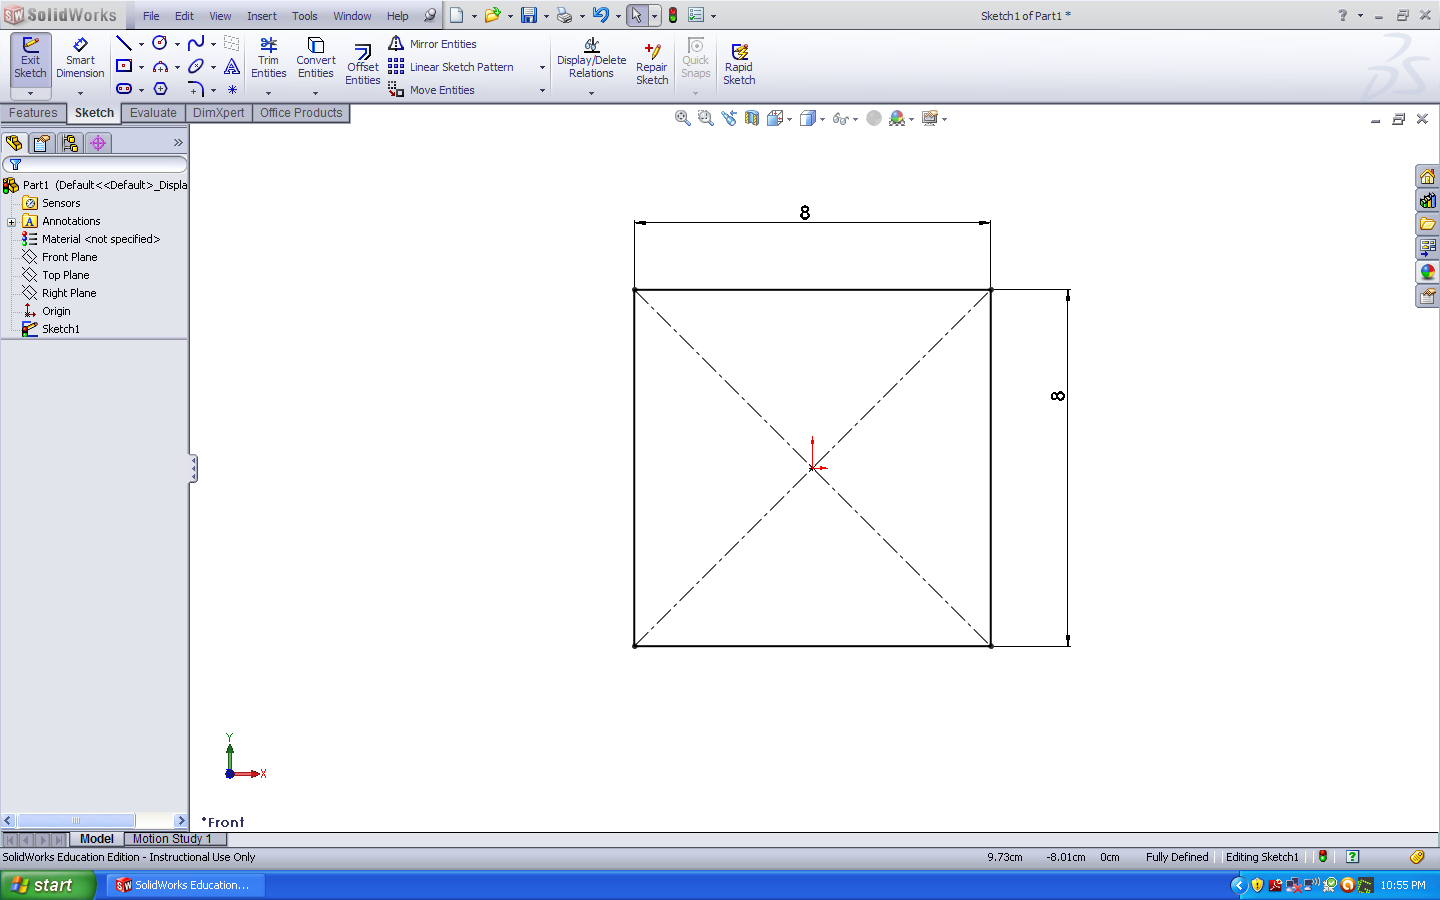
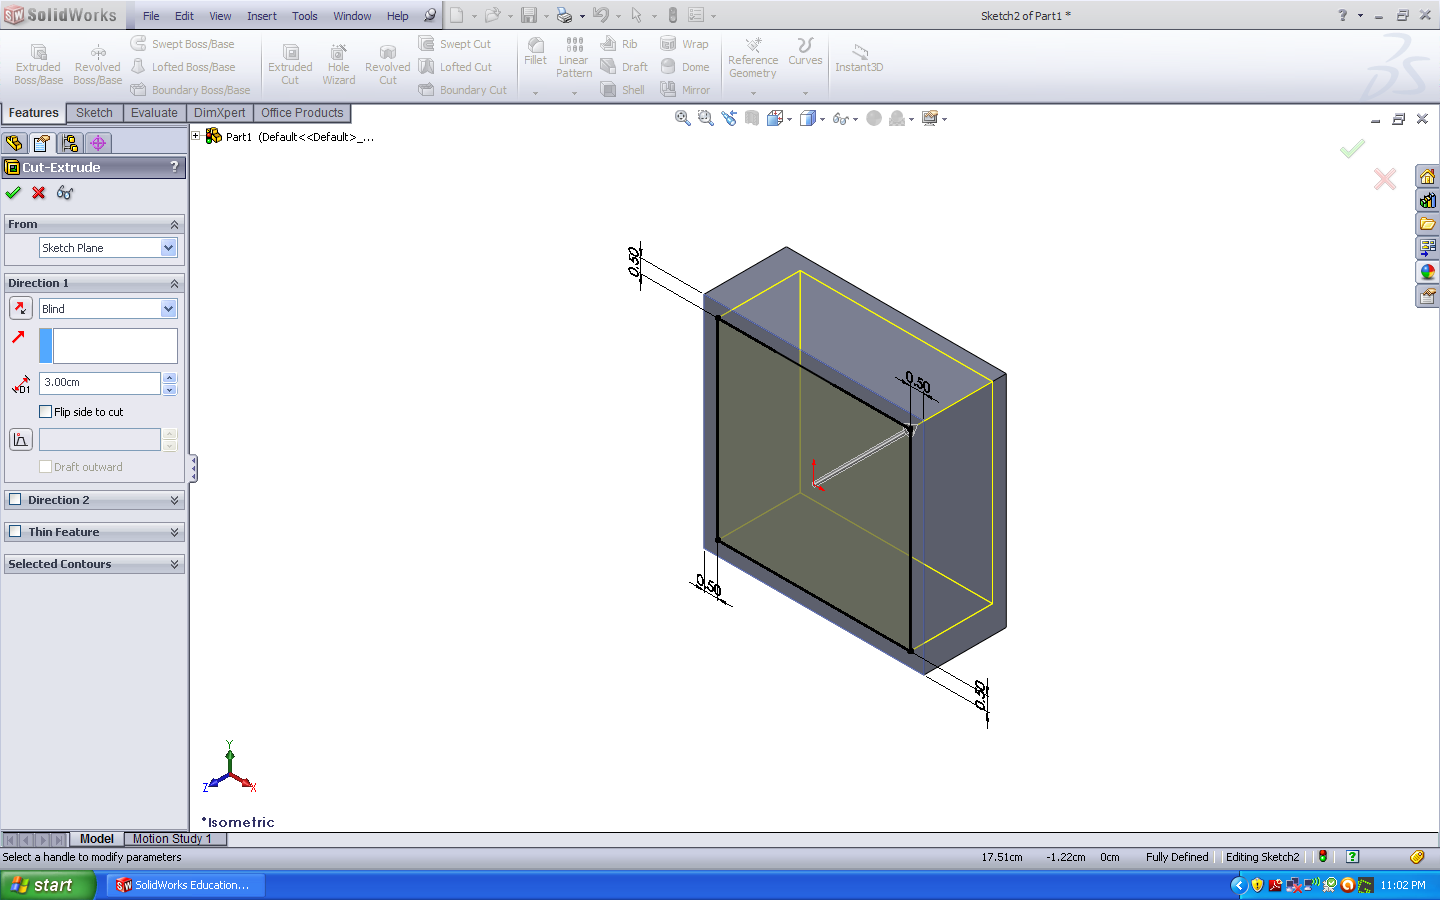
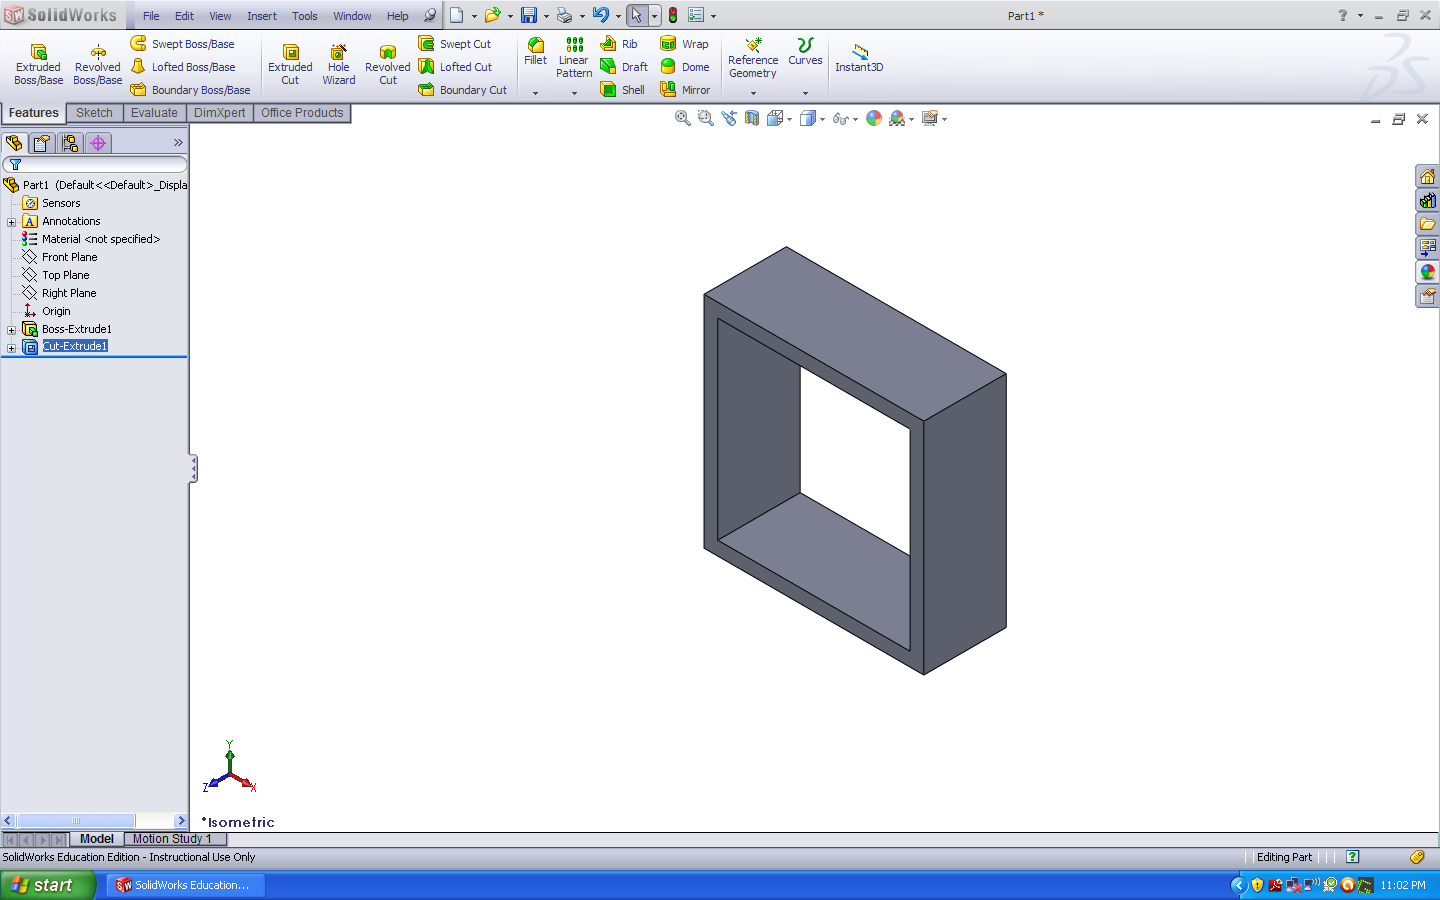
Each design started out as an idea or suggestion. Many times I found designs online that served as a good starting point and I worked from there. When I had decided on a plan, I designed the object in Solidworks, a 3D Computer Aided Design (CAD) software package. Solidworks is a parametric feature-based modeling tool, where 2D sketches are extruded or cut to create 3D objects. Here is a quick run-through for creating a simple square cutout on the program:


With a lot of sketching, extruding and cutting (and a few other tricks) you can make any 3D object you can think of – when it comes to a generative hardware technology unconstrained by the vendor, this is where it is happening!
Did the project work out as well as I hoped? It sure did! All in all, I have nearly 100 combined “likes” (to date) from other Thingiverse users on the things I designed, which ranged from medical devices to toy planes. One of my designs was featured on Thingiverse, having caught the eye of an administrator as a particularly good design. I even had other users printing out my designs (and taking pictures of them to show off!).
So, you may ask, what did I end up designing? Here is a run-through of the 10 “things” that I made.
_ _ _ _
Thing 1: X-Acto Knife/Hex Wrench Holder
**Featured**
Likes: 7
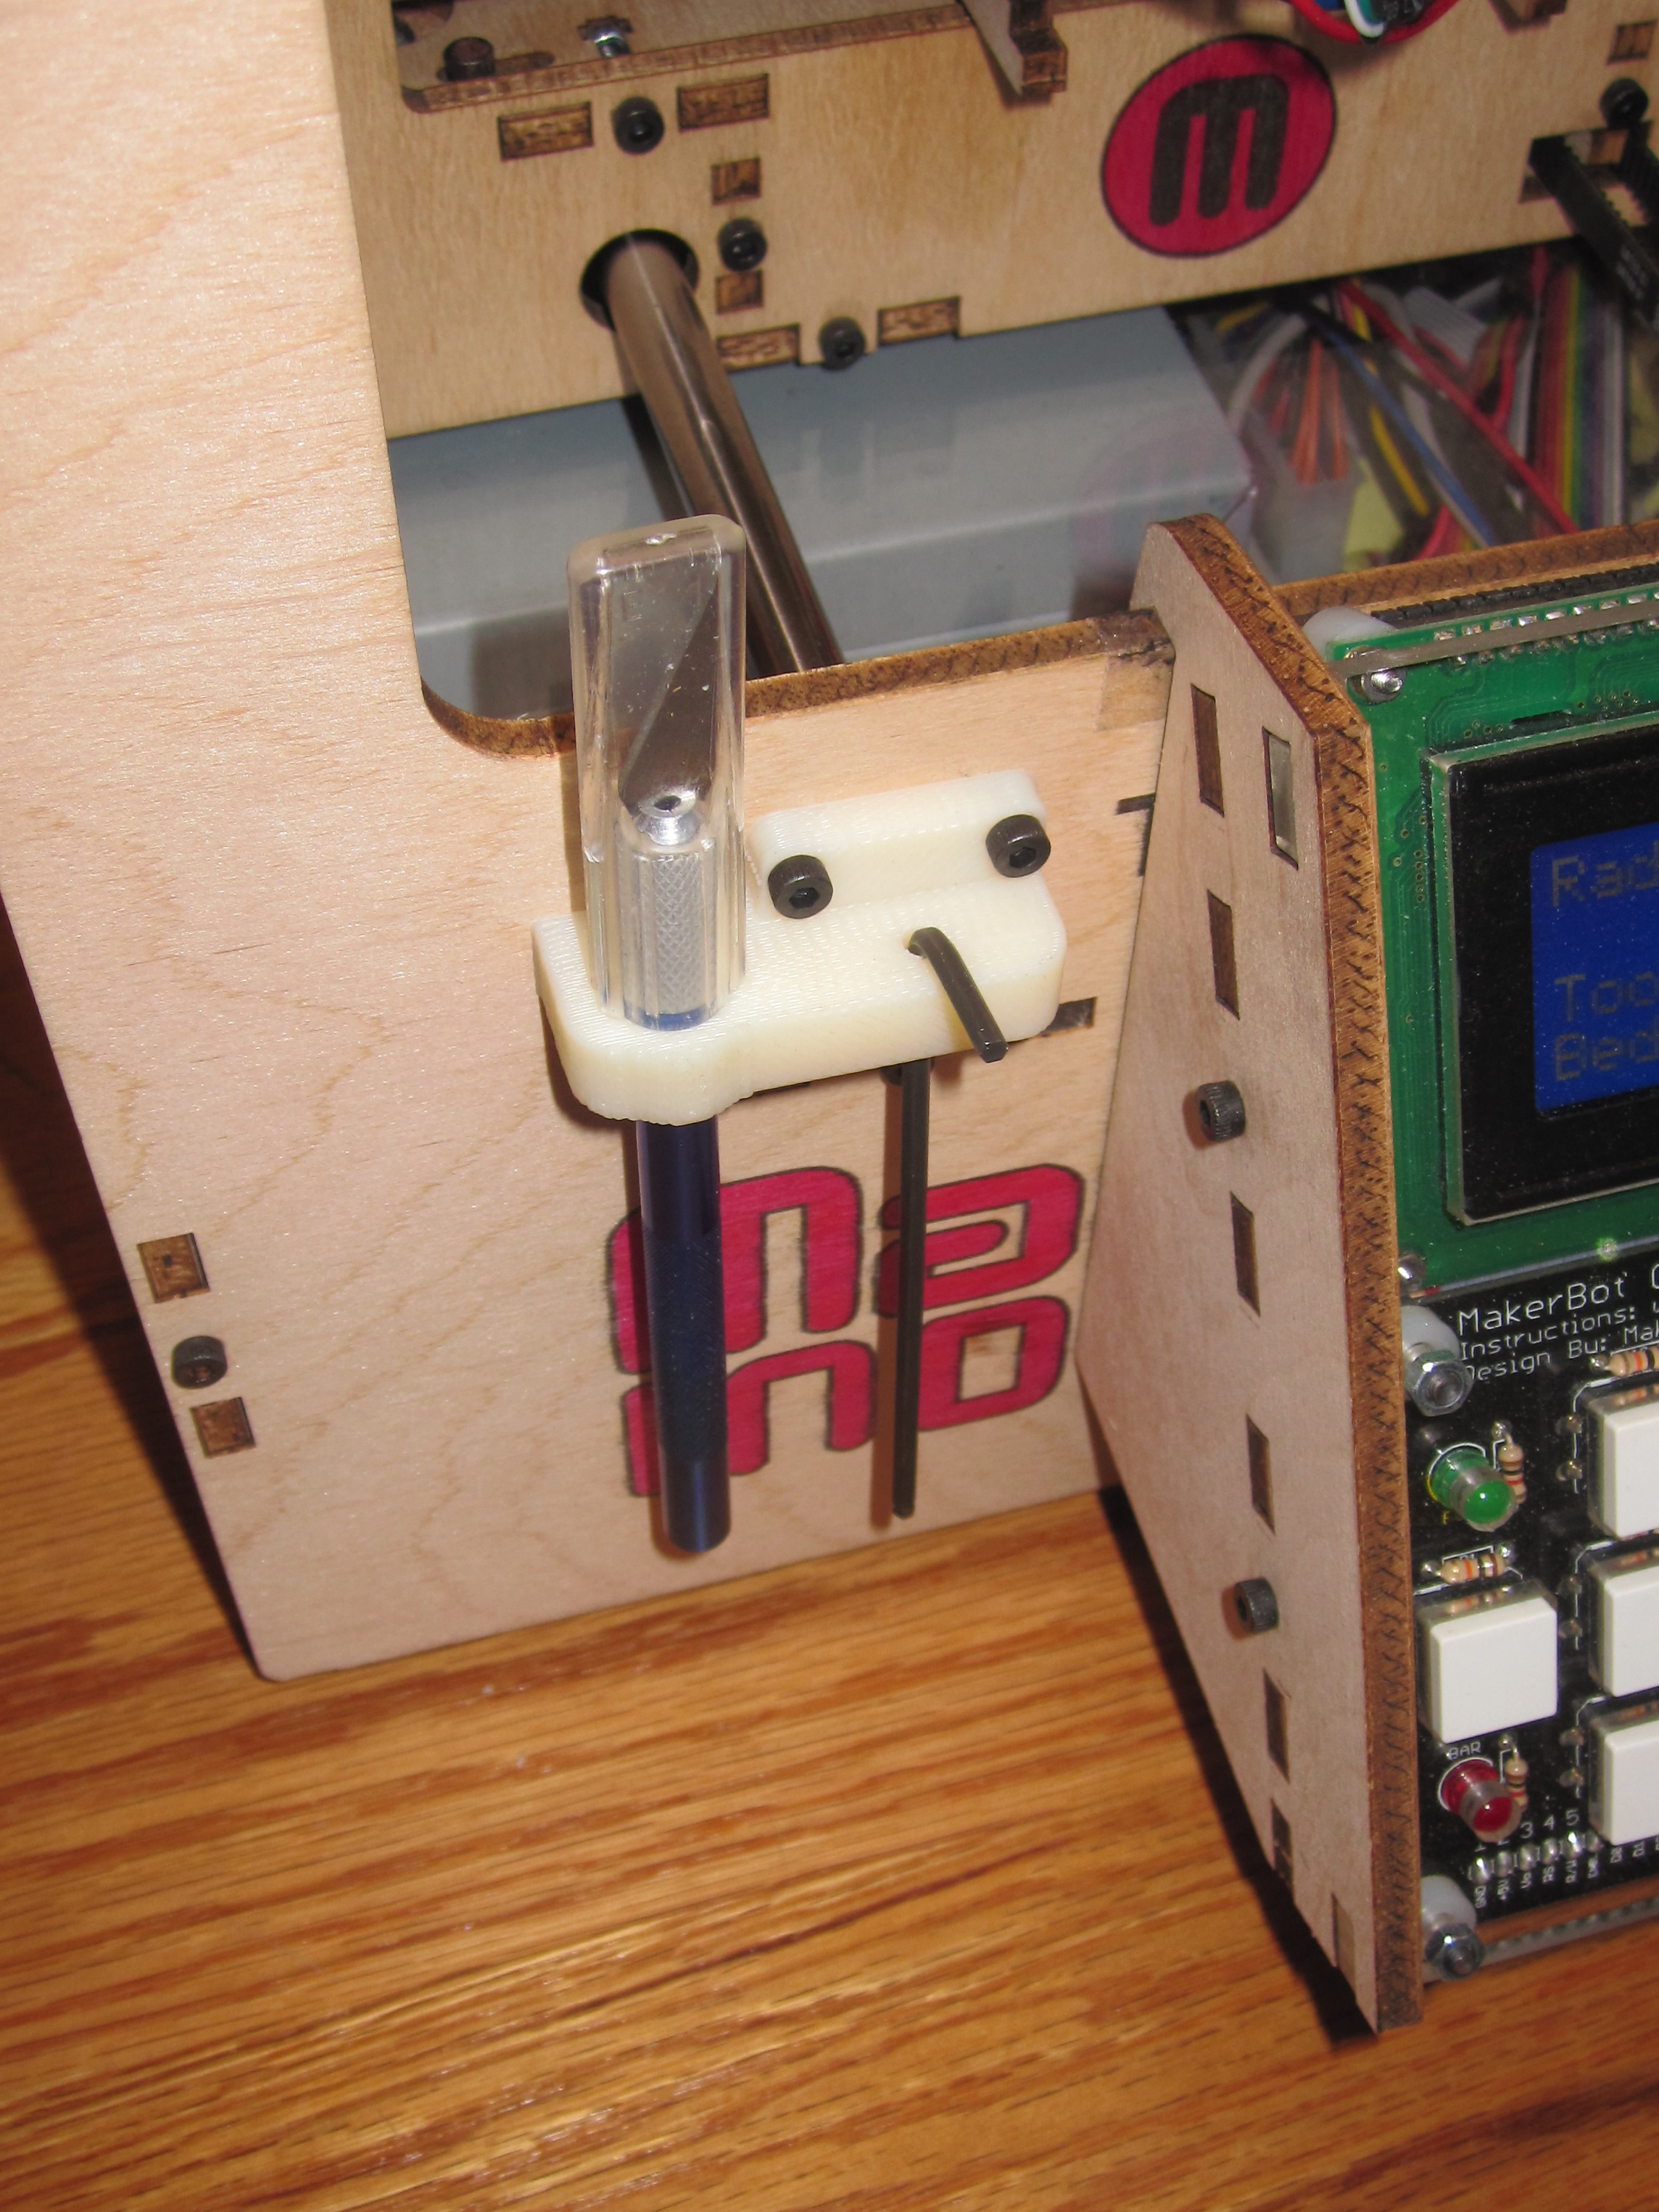
This thing was an integrated tool holder that attached to a pre-existing part on the Makerbot. It was something I had been thinking about for a while and wanted to make, and it served as a nice upgrade to my printer. Another user thought so too –
“Nice. I had been thinking about some kind of clip or mount for the wrench for some time.” – DigitalBytes, Okotoks, Canada
This design was featured the next day, having caught the eye of a Thingiverse Admin. For my first “thing”, it was such an exhilarating feeling to have been featured. In retrospect, this may very well have been by design (maybe all first time posts get featured?). In any event, it accomplished the goal of getting me excited to contribute more.
_ _ _ _
Thing 2: Parametric Radial Ornament
Likes: 8
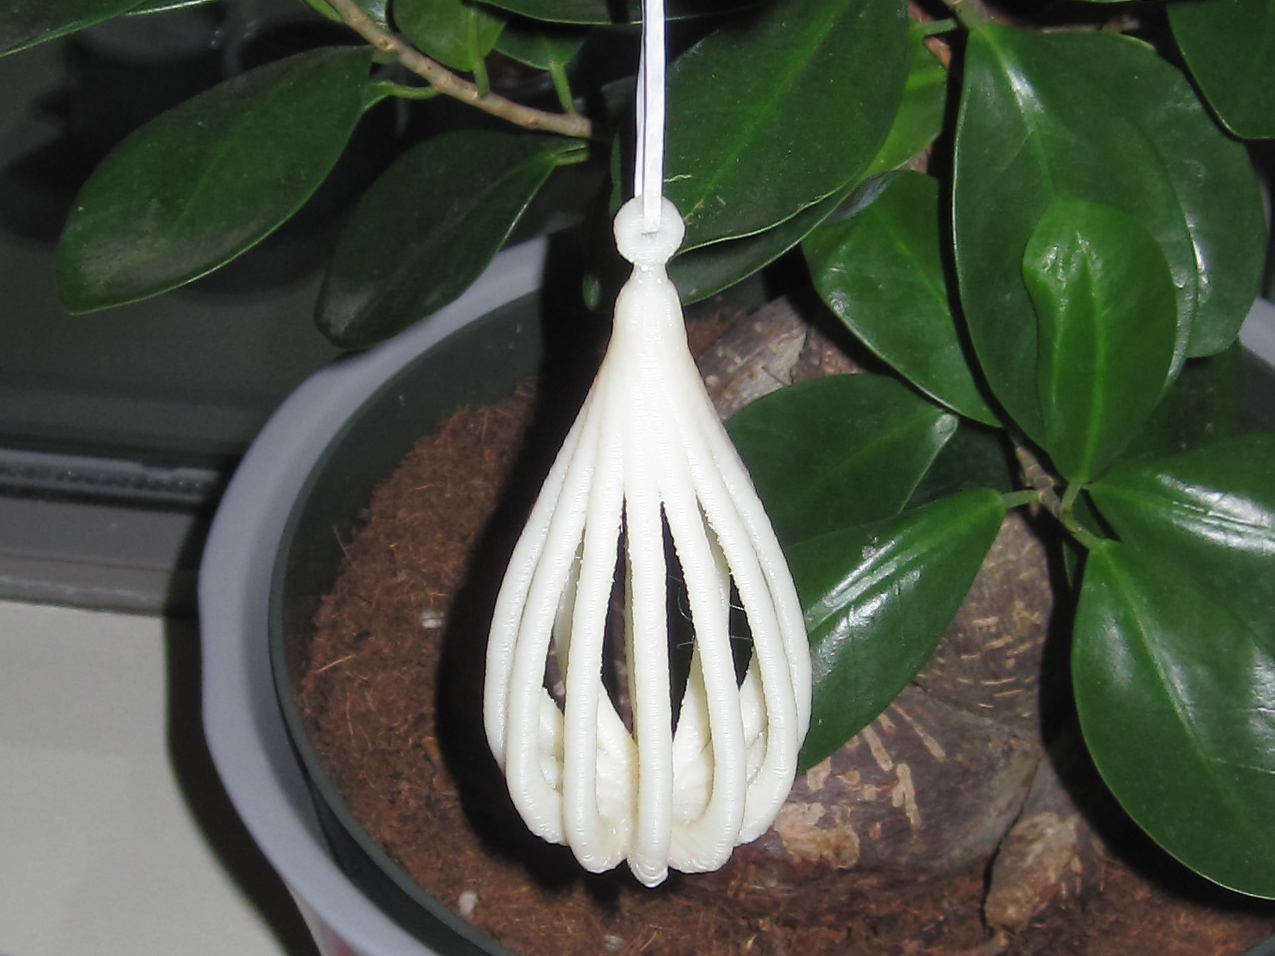
This thing was an ornament, which played with the printer’s ability to create enclosed negative space. I was asked to design an ornament by a friend and I was inspired by the tear-drop shaped ornaments and a whisk.
_ _ _ _
Thing 3: Decorative Coat Hook
Likes: 11

This thing was a coat hook for a friend who had run out of her 3M hooks and wanted something a little more aesthetically pleasing. I designed it to accept adhesive backing as well as a nail, for some flexibility in mounting.
What was exciting about this design was that another user MacGyver in Salt Lake City, UT liked the design and printed one out for himself! He commented:
“I’ve been looking for just this thing for awhile now. Thanks for the upload!” – MacGyver, Salt Lake City, UT
He also posted a picture of the design. This was electronic transmission of hardware! Talk about COOL!

_ _ _ _
Thing 4: Recycled Bottle Coat Hanger
Likes: 38
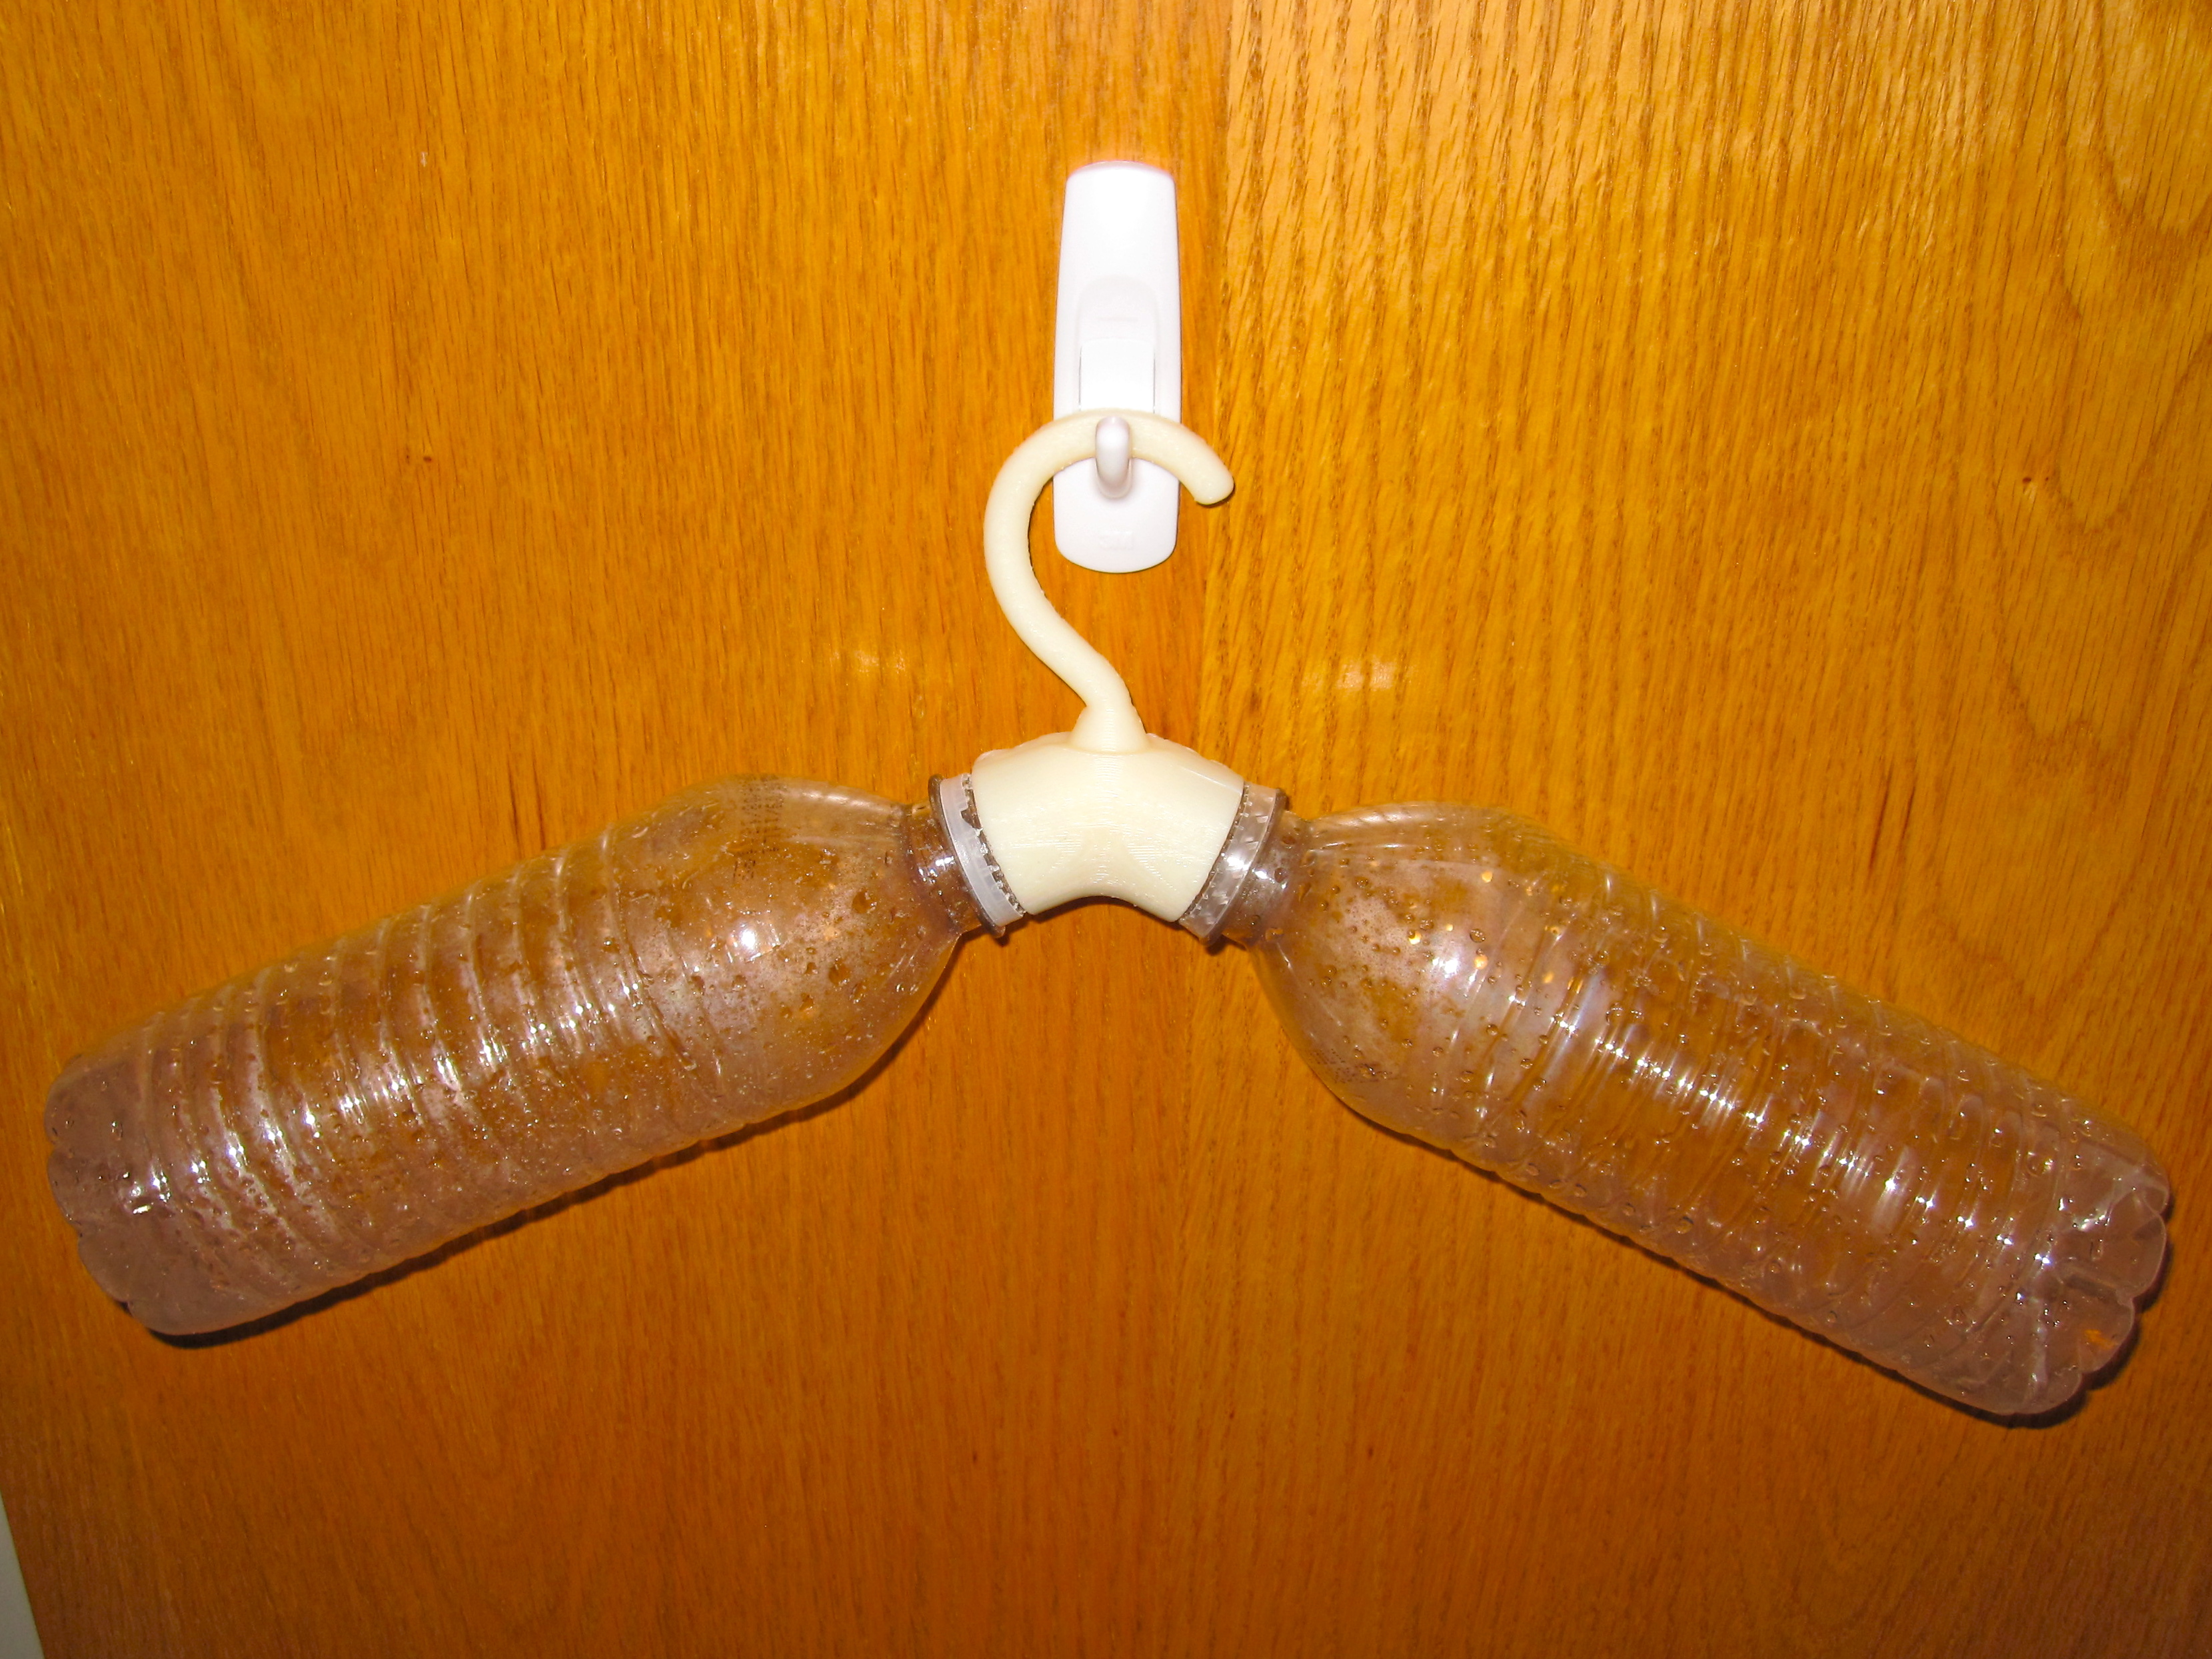
This thing was an attempt to do some recycling while designing and was requested by a friend who is very environmentally conscious. I was inspired to create this design from a similar product by Chinese designer Xuan Yu. I thought this was a great way to recycle 2 bottles while utilizing the printer’s capabilities. Here is an image of the print before I cleaned off the support material and assembled it.

This was the most “liked” design that I put together and the comments were so encouraging –
“This idea is amazingly clever! What a wonderful way to combine a 3D printer and recycling bottles to make a useful product. ” – PolygonPusher, Sweden
“What a brilliant idea!!” – Rasle500, Denmark
“This is genius !” – mrule, Providence, RI
I didn’t really expect to get such good feelings from sharing my designs with the community, but here I was, excited to post more!
_ _ _ _
Thing 5: Glasses and Cleaning Cloth Moustache Stand
Likes: 7

This thing was suggested to keep a pair of glasses safe and cleaning cloth handy. It a “moustache stand” – a play on a design my girlfriend found here. The Makerbot is capable of printing out in different colors (depending on what color raw material you have). I had a spool of black ABS and I thought it would work well with the design.
_ _ _ _
Thing 6: Arrow Bookend
Likes: 4

This thing was requested and designed using inspiration from a similar bookend.
At this point, I was really getting into the groove of cranking a couple of designs out a day! It was really fun watching my designs and waiting for comments, “likes”, and printed copies by others!
_ _ _ _
Thing 7: Plantar Fasciitis Pain Reduction Apparatus
Likes: 4


This thing was suggested to me by a Physical Therapist who sufferers from pain due to Plantar Fasciitis to help alleviate discomfort. It was a resting splint for sleeping or relaxing (not walking) designed to apply tension on the ball of the foot. This was an improvement over current devices that put tension on the toe using a tight fitting sock, which causes discomfort to the toe. The printed component allows the foot to be supported with the commercially available straps.
_ _ _ _
Thing 8: Lockheed Martin RQ-170 Sentinel Toy Model
Likes: 7


This thing was suggested to me by an engineer and enthusiast. It is a miniature mockup of the Sentinel stealth drone (also known as the Beast of Kandahar) developed by Lockheed Martin.
I thought I would have a little fun with the caption too, given recent events in relation to this story.
“Iran got an early Christmas present… So can you!”
_ _ _ _
Thing 9: Photo Keychain
Likes: 2
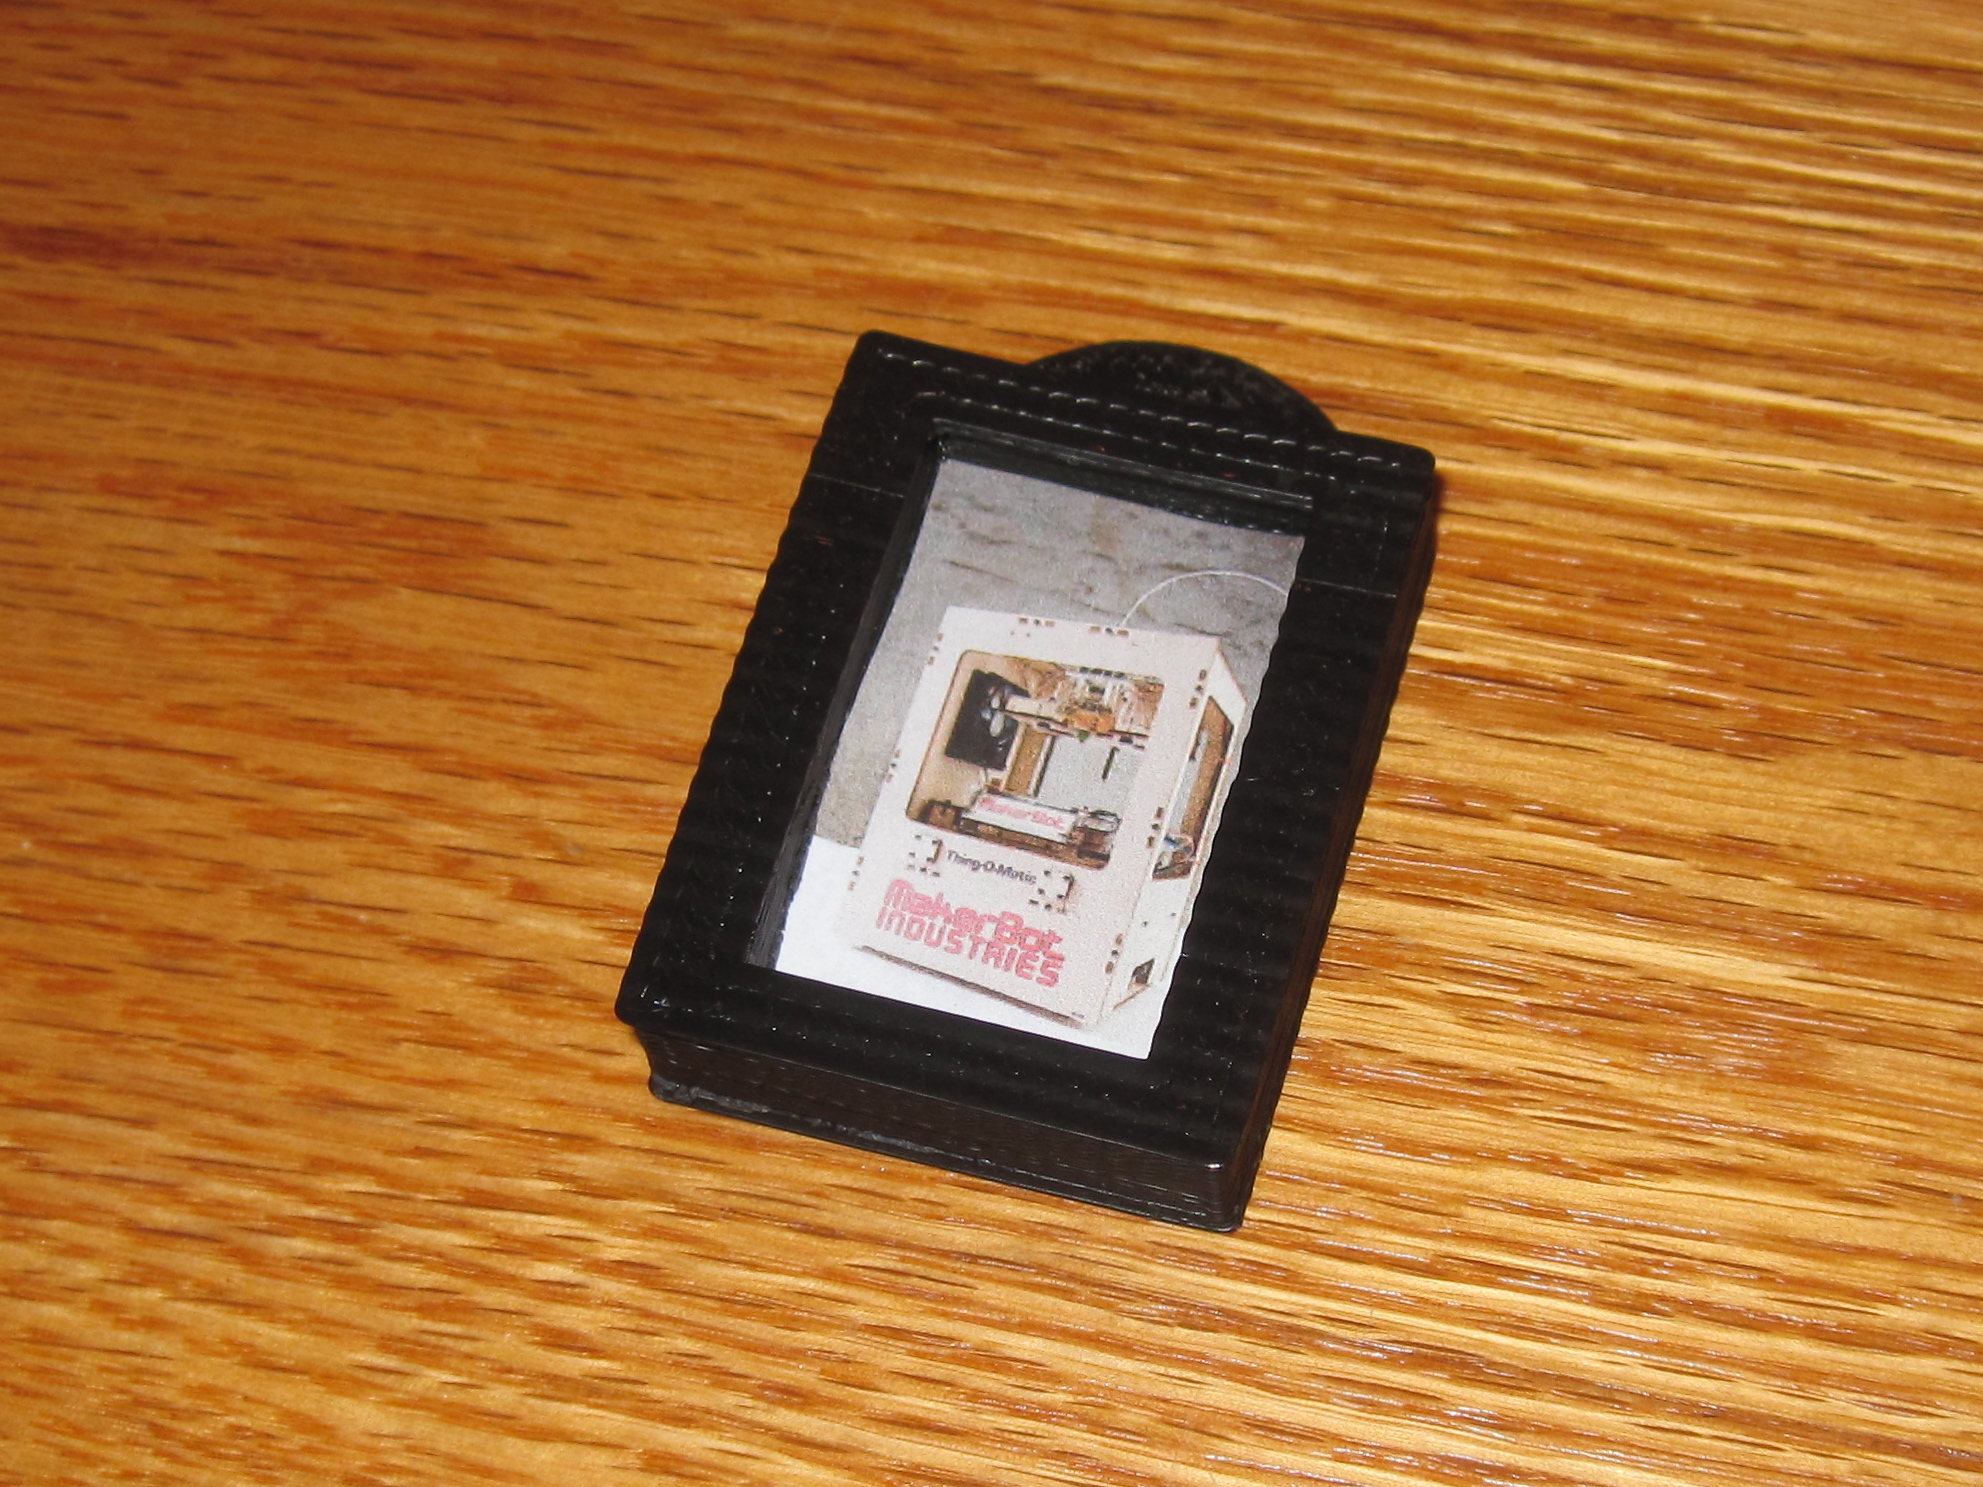
This thing was the only design that featured two separate interlocking parts. A suggestion came along for a photo frame keychain for backpack or purse. One could place a photo within (1″x1.5″ size) along with a 1″x1.5″x.25″ piece of plexiglass and snap/glue the pieces together to create the keychain.

_ _ _ _
Thing 10: Watch Stand
Likes: 14
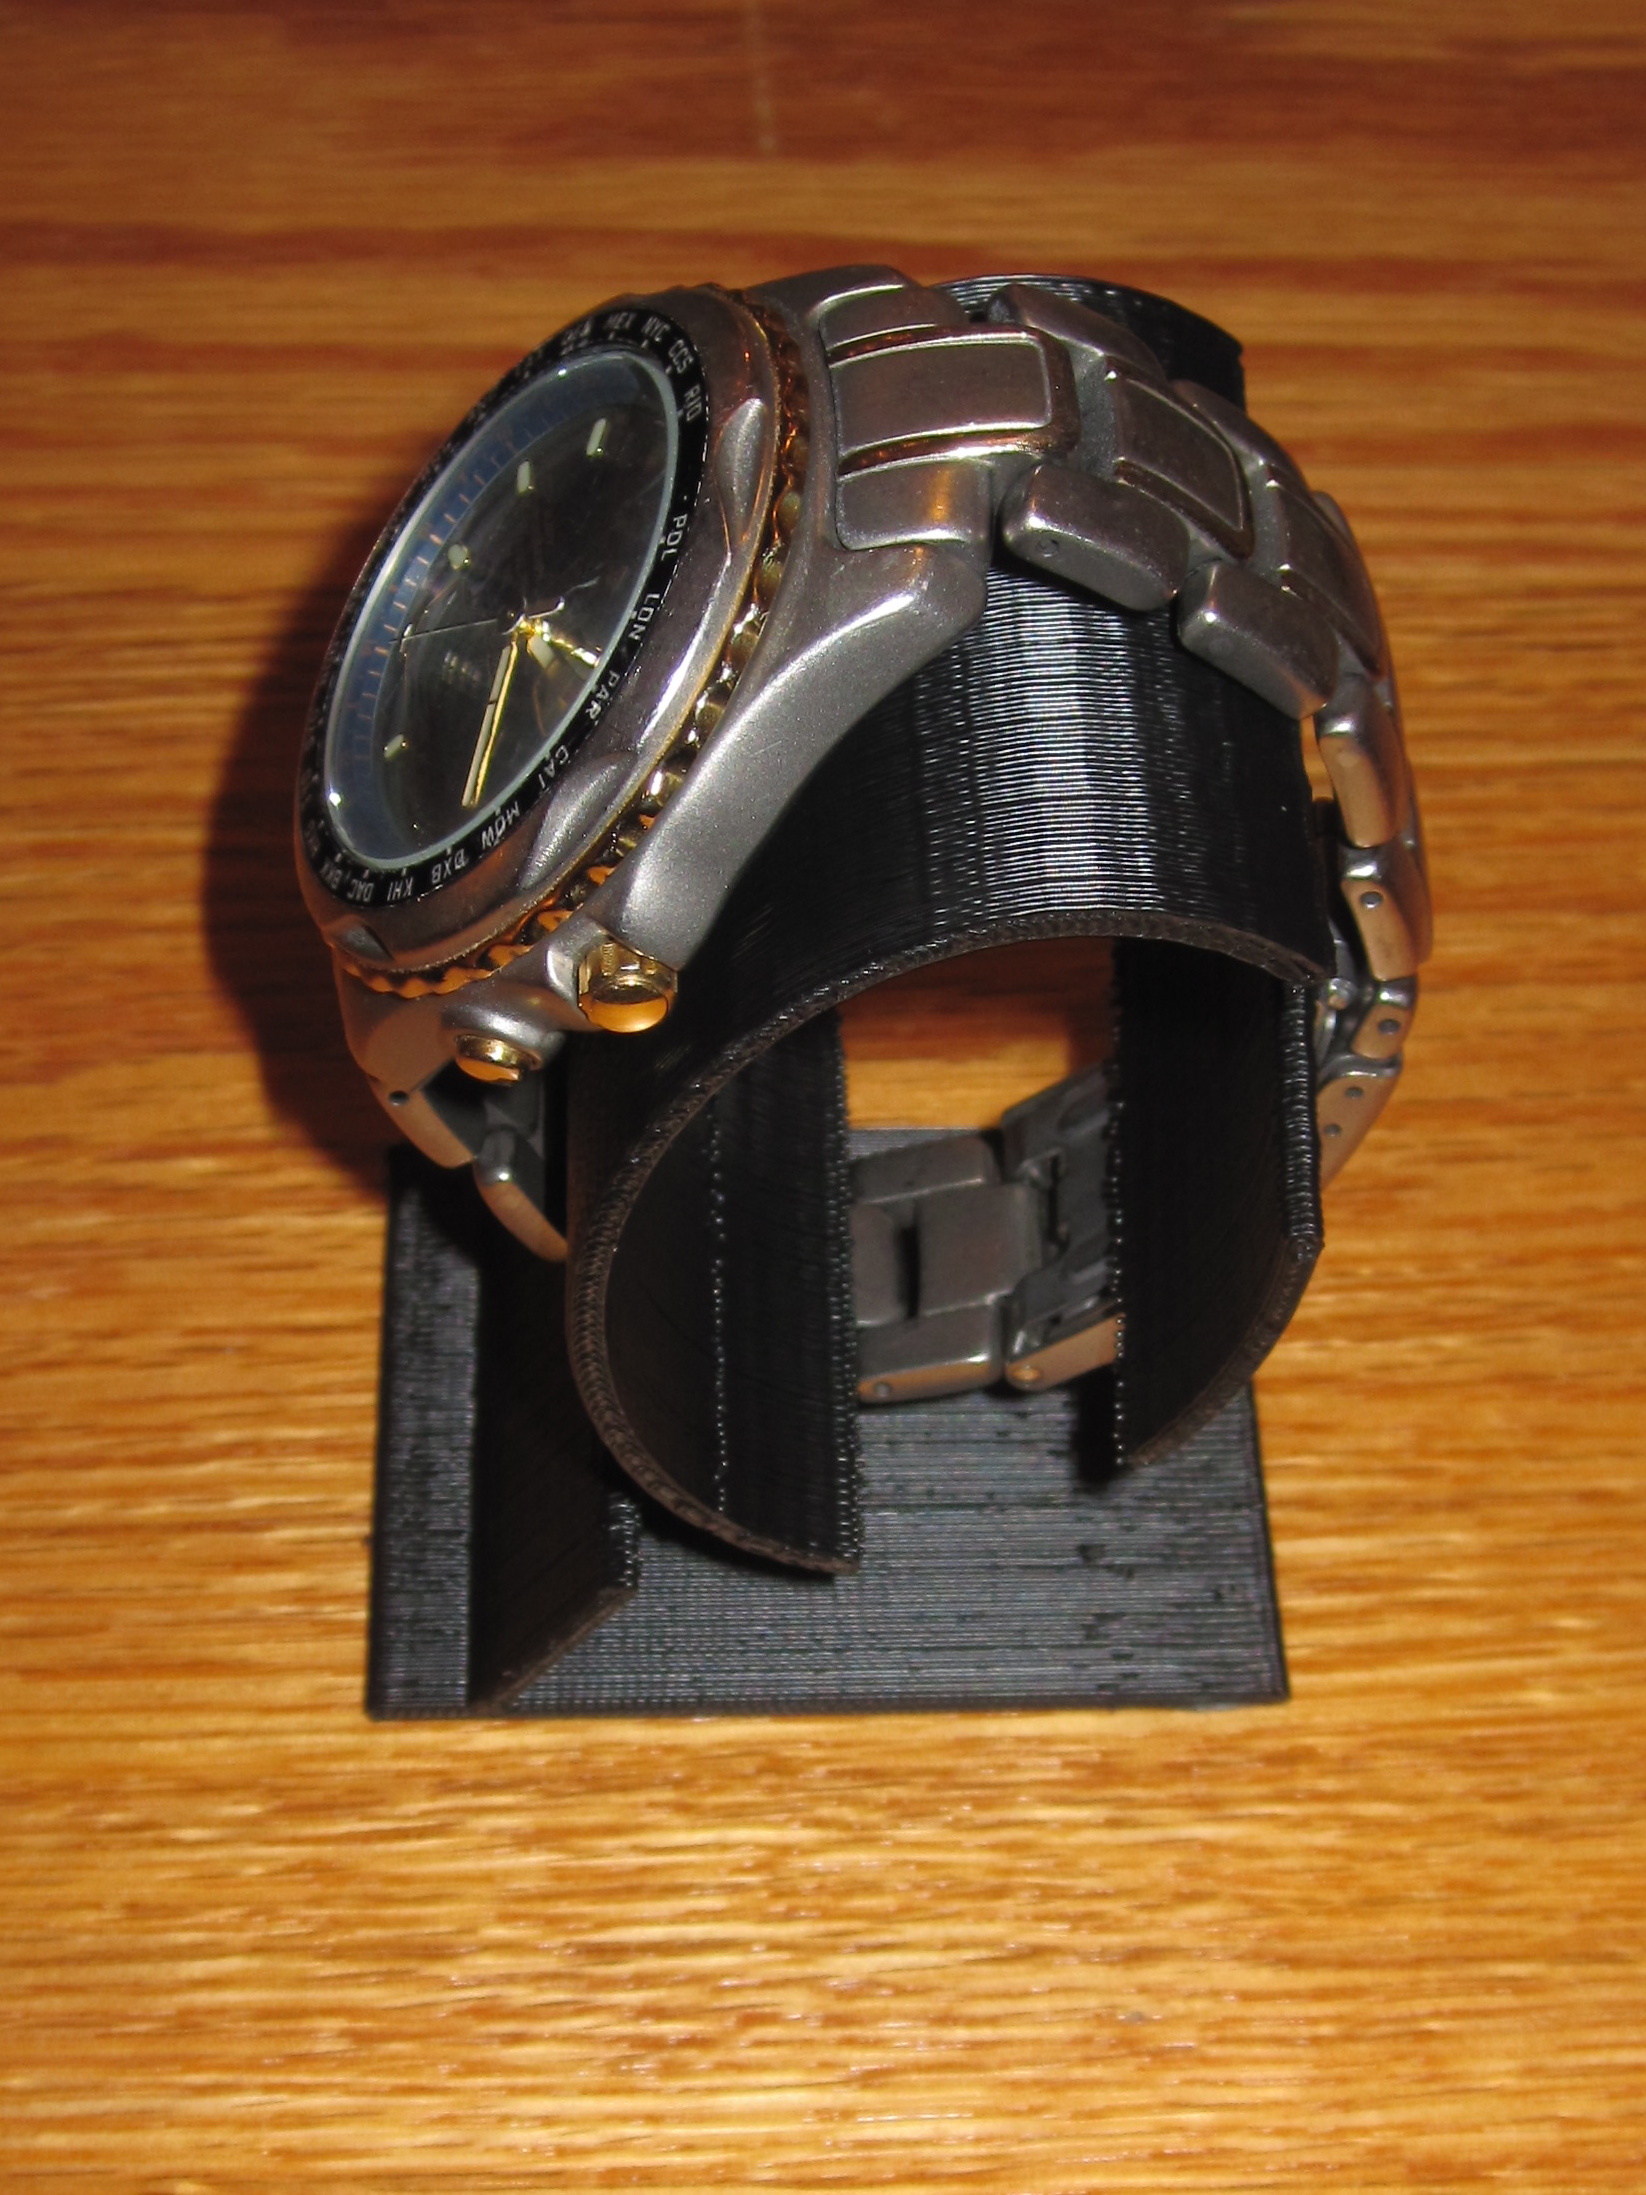
This thing was modeled after those watch stands they have in stores for holding watches up in display cabinets. A friend wanted one so that they could hold their watch up to the light to charge their solar watch during the wintertime.
_ _ _ _
I want to thank everyone who contributed ideas and helped me make this final project possible!
If you would like to check out my things on thingiverse, visit Indigojin.
Happy Holidays everyone!


Great Project Nick. Thanks for sharing.
Uncle Alex
Soon we will all be Techno peasants!
LikeLike